January 22, 2005
Vagabond Poncho
I was pretty blase about the whole poncho craze until I spotted the Vagabond Poncho in Design Source 5 Collections book. This "poncho" is really a cape, held together with a single button, so that it looks like a poncho when worn. As designed, it is knit using Manos del Uruguay wool yarn, which I totally love. I went to my local yarn store to buy the pattern and yarn and I couldn't believe it: they had a sample of the poncho on display. It was great to try it on before making the final decision to knit this garment since the cost of the yarn is high. After trying it on, I decided that it would need a few more inches added to the length. I added 4 inches to the front and back (and I'm short).
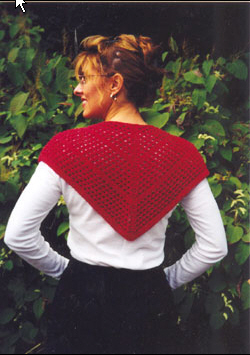
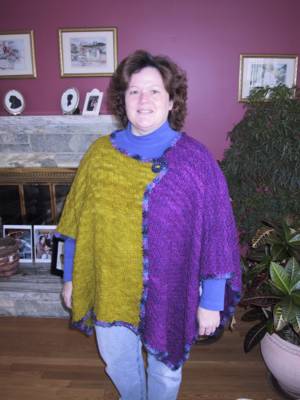
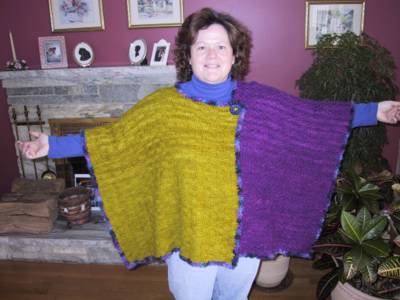
I guess I was in a rather zany mood the day I went shopping because I picked citric (lime green) and raspberry (magenta) for the two colors. I found a hand made pottery button at the same time that clinched the color choices. The pattern called for single crochet only on the front edge of the right front using matching yarn. I decided to create a more decorative border around the entire garment using Schaefer Yarns Blossom, a hand dyed mohair boucle yarn, in the colorway called Lillian Hellman. I knitted the main body using US #7 needles and crocheted the trim using a US K needle. Here I am modeling the completed garment. The magenta color looks more purple in these photos.
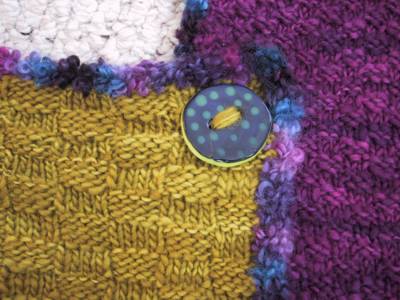
Here's a close up of the button closure. You can also see the textured stitches used for the two sides of the poncho. The magenta was knit in a simple 2x2 check and the green was knit in a 4x4 check. I crocheted the trim using a half double crochet stitch. This photo is a better rendering of the magenta color.
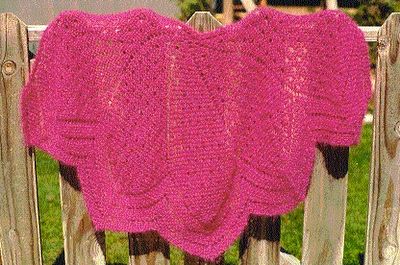
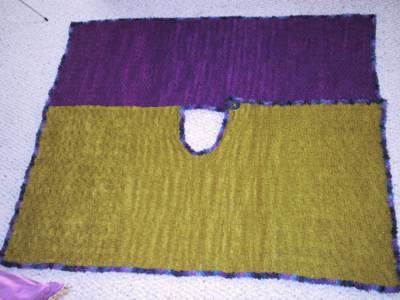
I've had several questions about the shape of the poncho, so here's a sideways picture of it spread flat on the floor. You can see that the primary side has a keyhole notch to make room for the neck.
I guess I was in a rather zany mood the day I went shopping because I picked citric (lime green) and raspberry (magenta) for the two colors. I found a hand made pottery button at the same time that clinched the color choices. The pattern called for single crochet only on the front edge of the right front using matching yarn. I decided to create a more decorative border around the entire garment using Schaefer Yarns Blossom, a hand dyed mohair boucle yarn, in the colorway called Lillian Hellman. I knitted the main body using US #7 needles and crocheted the trim using a US K needle. Here I am modeling the completed garment. The magenta color looks more purple in these photos.


Here's a close up of the button closure. You can also see the textured stitches used for the two sides of the poncho. The magenta was knit in a simple 2x2 check and the green was knit in a 4x4 check. I crocheted the trim using a half double crochet stitch. This photo is a better rendering of the magenta color.

I've had several questions about the shape of the poncho, so here's a sideways picture of it spread flat on the floor. You can see that the primary side has a keyhole notch to make room for the neck.

January 21, 2005
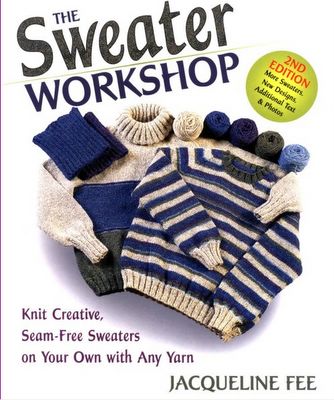
Jackie Fee's Sweater Workshop, part 3
I'm finished! What a relief. It was very difficult for me to toil away on this sampler knowing that in the end I'd only have a "thing" to show for my efforts. I did learn some new techniques, which was the purpose of the exercise. I'm now ready to move on to making my first seamless sweater from the bottom up using the techniques in the book. Here's a picture of the front of my completed sampler. You can see that we experimented with different rib stitches, created a knitted belt and i-cord lace, knitted textured stripes using slip stitch variations, did some two-handed fair isle, and several creative bind off edgings.

And here's the back. They don't show up well but on the back you can see a mini cardigan band w/ button and an afterthought pocket above the knitted belt.

Here's a close up of the knitted cast offs. There's a ribbed cuff, a lace edging, an i-cord edging and a hem along the top edge.
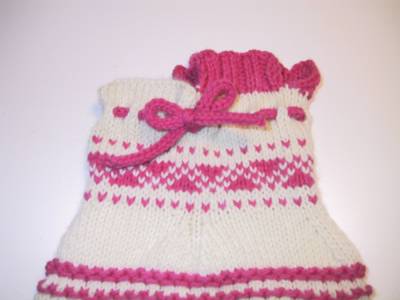
In this final photo, you can just make out the afterthought pocket to the left of the button. This pocket was added in as the last step in the sampler. I snipped a yarn, unraveled across, picked up the loose stitches, and knit the pocket insert in the round. This was a fun thing to learn.
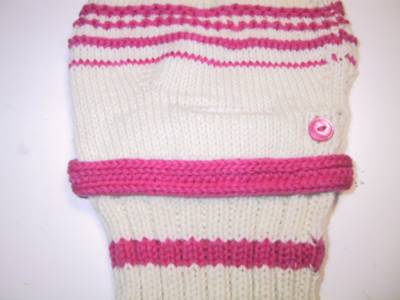

And here's the back. They don't show up well but on the back you can see a mini cardigan band w/ button and an afterthought pocket above the knitted belt.

Here's a close up of the knitted cast offs. There's a ribbed cuff, a lace edging, an i-cord edging and a hem along the top edge.

In this final photo, you can just make out the afterthought pocket to the left of the button. This pocket was added in as the last step in the sampler. I snipped a yarn, unraveled across, picked up the loose stitches, and knit the pocket insert in the round. This was a fun thing to learn.

January 15, 2005
Holiday Happenings: Socks
I had a wonderful time over the holidays, spending time with family in Florida and knitting (of course!). This year I made three pairs of socks for family members. They were made with two strands of Lion Brand Wool-Ease yarn (80% acrylic, 20% wool) and knitted in the round with two circular needles, US #7. These are nice and bulky socks, perfect for in boots or knocking around the house. I measured each of the recipients and made a custom pattern for each. Here's my husband modeling his socks.


My son felt left out and asked me to make a pair of socks for him. He wants red socks with green money signs on the sides. I thought I was done with knitting socks for a while. I guess not :)


My son felt left out and asked me to make a pair of socks for him. He wants red socks with green money signs on the sides. I thought I was done with knitting socks for a while. I guess not :)
January 01, 2005
Crayon Box Jacket Project Page
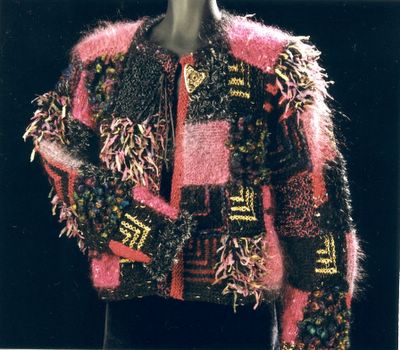
The Crayon Box Jacket is a design by Chris Bylsma. There is a knit-along group on yahoo! that I joined to get inspiration and motivation. Here's a picture of the jacket from Chris' website:

Hanne Falkenberg Studio Sweater Project Page
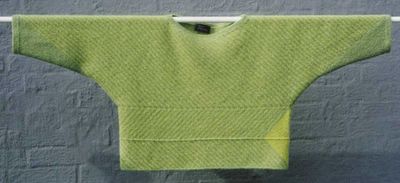
Here a is picture of the completed sweater in my selected colorway from Hanne's website:
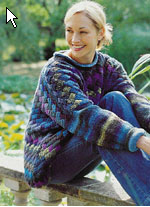
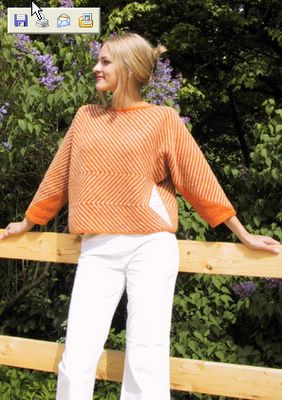
Studio sweater on a model (not my selected colorway):
I purchased this sweater as a kit from Beth Collins at Unique One in Camden, Maine. Although I'd love to go to Camden some day, Beth was a vendor at SPA III in Portland, Maine, which I attended in February. This sweater is made from two-ply (fingering weight) yarn and is entirely made from garter stitch. I knit a lot faster in my traditional way, using 14 inch needles with the right one held under my arm. I also seem to get more consistant tension this way, too. I've minimally swatched and will be knitting this sweater on Susan Bates 14 inch needles in a size US #2 (2.75mm).

Studio sweater on a model (not my selected colorway):

I purchased this sweater as a kit from Beth Collins at Unique One in Camden, Maine. Although I'd love to go to Camden some day, Beth was a vendor at SPA III in Portland, Maine, which I attended in February. This sweater is made from two-ply (fingering weight) yarn and is entirely made from garter stitch. I knit a lot faster in my traditional way, using 14 inch needles with the right one held under my arm. I also seem to get more consistant tension this way, too. I've minimally swatched and will be knitting this sweater on Susan Bates 14 inch needles in a size US #2 (2.75mm).

